Collage

Collage
Hello and thanks for visiting my blog. I have been knitting on and off for 50 years and I recently learned to crochet. I love looking for wool bargains and making them into something useful. I mainly knit for charity. I occasionally knit for myself and family members if I find a really good pattern or if they ask nicely!!
Showing posts with label sewing. Show all posts

Tuesday, 19 January 2021

Definitely the last masks...


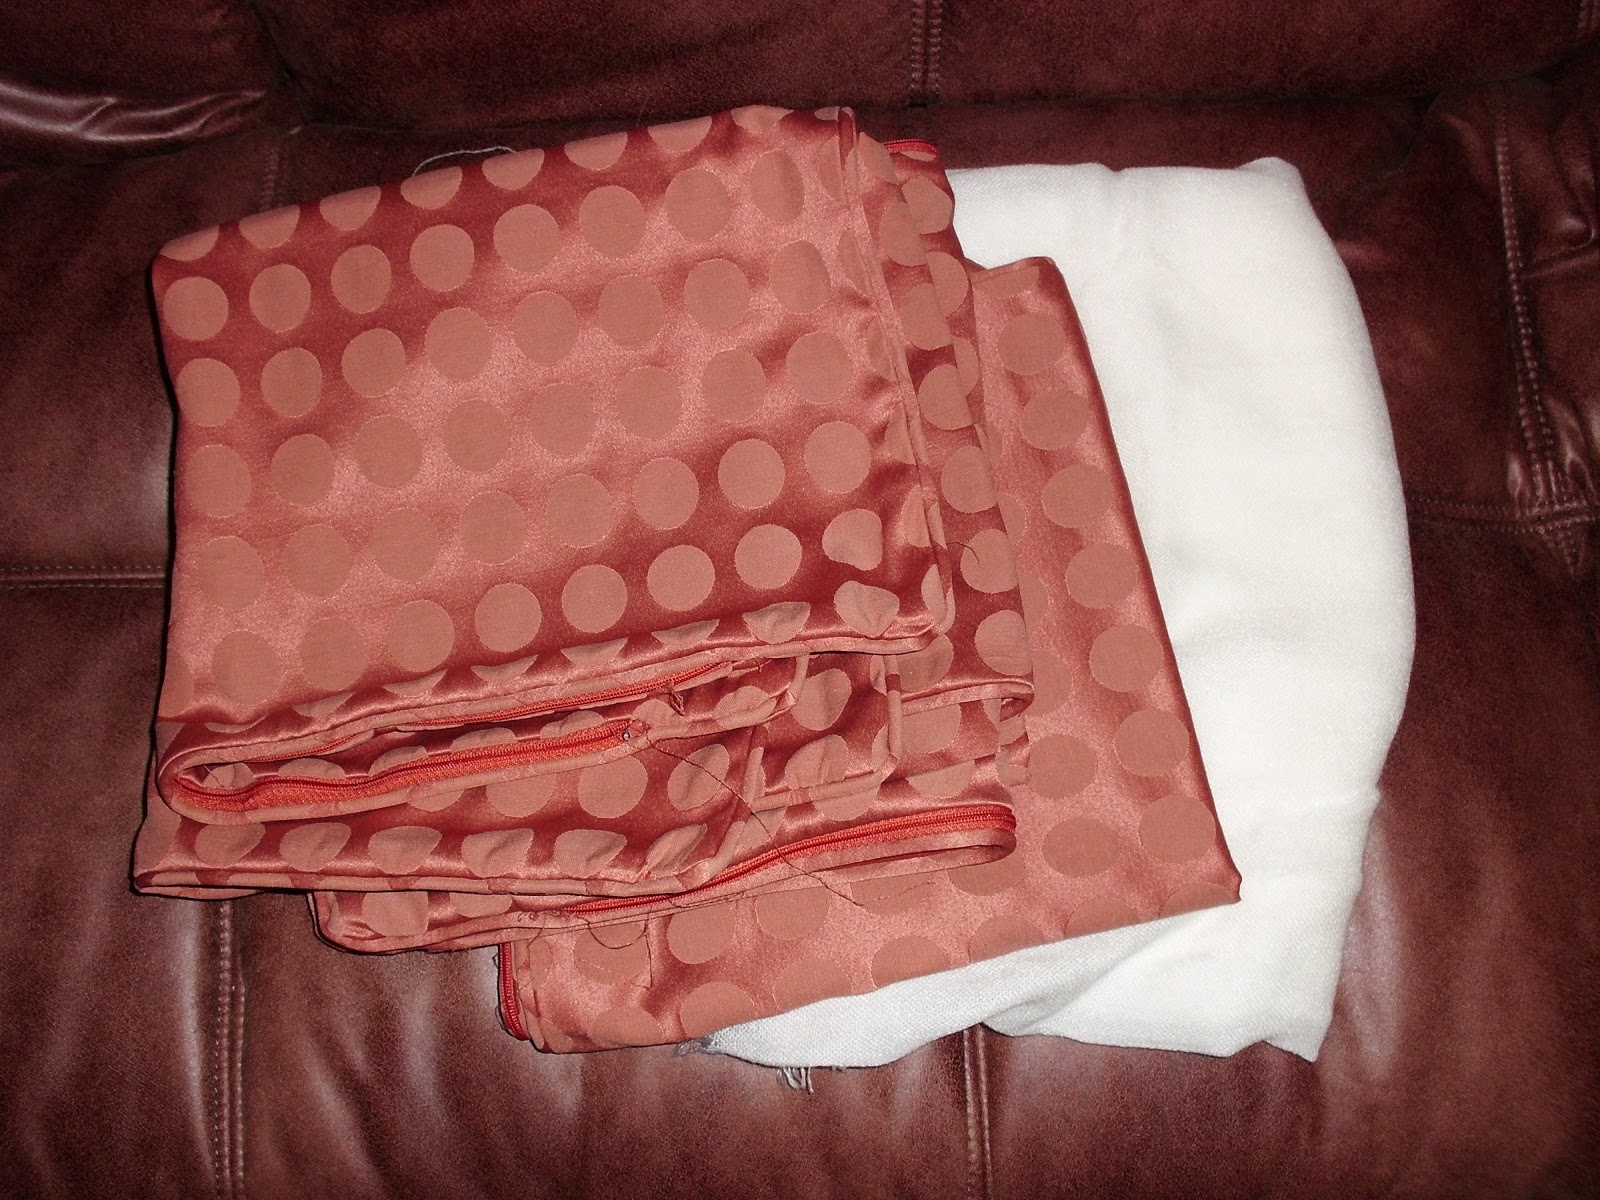
Back in December, before our latest lockdown, I was volunteering in a charity shop. I decided it was high time to make some more masks, but this time in a plain, light colour. Because I wash my masks every day, they are starting to look past their prime. So I dug out my material scraps and made these two beauties. The material came from my wedding dress that I cut up for projects yonks ago. Waste not, want not. I never dreamed decades ago what that material would eventually be used for. Very sad. 😢

Anyway, what is even sadder, is that my charity shop which was decorated and stocked up for Christmas, was closed at very short notice by the latest lockdown a few days before Christmas. It looks like being months before it is allowed to open again. Christmas will be a distant memory, which is just as well really as it was not what we were all looking forward to. 

The only silver lining is that, when we reopen, I will have two summery masks ready to wear. I'm expecting mask-wearing to continue for the rest of 2021 and maybe even longer on public transport. But I'm not going to make any more. I have a boxful now and that's enough.

I'm making very slow progress on the crochet blanket that I started months ago. Every time I sit down to work on it I suddenly find myself with a lapful of cat. She is 18 now, so how can I say no?!

Hopefully, I will be able to show a photo of the blanket in progress in my next blog post. Watch this space...


Wednesday, 2 December 2020

Another [collective noun] of masks...


Who can come up with the best collective noun for face masks? Oops, we're supposed to call them face coverings here in the UK, but very few people do. I happily wear them when I have to. But I don't in the slightest believe they protect me from anything. I read recently that the virus is so small that a tablespoon could hold all the virus in the world. If I can breathe air in and out of a mask, then the virus can find its way in as well. Oh well, so far so good. At least my face is warm.

I made another 14 masks for the worry monsters project run by Knit-for-Nowt. They will be distributed to therapists and social workers throughout the UK. Apparently there is a very long waiting list for the monsters, so I know whatever I can make will be put to good use very quickly. I will be so happy when these are no longer needed; hopefully next year.

I should have said I made 15 masks. I did, but one of them was possessed. I made every mistake possible on that one mask: crooked seams, loose tension, broken elastic etc etc. Eventually I did something I very rarely do and aimed it at the bin. Bullseye! 

I have knitted something possessed in the past. There were too many stitches, dropped stitches, purl instead of knit etc etc. That had to go in the bin as well because yarn can only survive so many rip outs and reknits. I haven't crocheted anything possessed yet. That is only because I crochet very slowly and carefully and only attempt easy projects. Having said that, I have probably just jinxed myself!

Someone sent me some Christmas material and asked me to make her some Christmas masks. Here they are:


I wouldn't wear one myself. But she was pleased with them and that's all that matters. I expect we'll see many more Christmas themed masks in the next few weeks.

I'm going to sign off now and catch up on reading my favourite blogs. Thanks for visiting and commenting throughout this strange year. I read and appreciate all the comments even though I can't always think of a reply. 

Wishing everyone a good Christmas and an even better 2021


Sunday, 18 October 2020

All masked out...


I decided to make a couple of pretty masks...for myself this time. There was a bargain rail outside a charity shop. On it I found a little skirt for £1. The material was lovely. It was such a small skirt with seams in all the wrong places. So I just about managed to cut enough pieces to make two masks. 

I use the fantastic pattern by Dhurata Davies. It is so comfortable and stays in place without constant adjustments. There are three layers as recommended by the medical experts. So it was quite hot in the summer even though I use cotton material. But we are now coming up to the cold seasons and this is already keeping my face toasty warm.

Talking of charity shops, I recently started volunteering in one on two mornings per week. It was for entirely selfish reasons. I was going stir crazy because I'm waiting until at least next year before braving the gym again, and my other voluntary work hasn't really restarted properly yet. So the charity shop gives me a good opportunity to get out and keep active.

It's quite an eye-opener to see what goes on behind the scenes. We receive tons of donations and most are good quality. So far, I've managed to resist the urge to buy everything apart from one little jumper. It's lovely to see people buying the bargains. It's not so lovely dealing with customers asking for price reductions or even freebies. Luckily, I wear a mask and they can't see the disgusted look on my face. We are a charity shop for goodness sake! It's even less lovely when items are stolen. That is rare but extremely annoying. I suggested that maybe the thieves are really desperate. But the manager checks the CCTV and says you'd be shocked at the unexpected people who steal.😢

I made some more masks for the Worry Monsters given out by Knit-for-Nowt. Clare, who runs the charity, asked for material in plain colours instead of my carefully sourced children's patterns. I can see how the patterns might have detracted from the amazing monsters that she receives. For these masks, below, I just used material from old t-shirts. All the masks I have made, patterned and plain, have been given out and were very well received according to Clare.


It's worth looking at the Knit-for-Nowt website to see what marvels are sent in. The therapists who receive them are rightly delighted with them and Clare has a long waiting list of people who have requested the monsters. If anyone feels like knitting, sewing or crocheting even one monster she would be very grateful. She is based in the UK and gives out her address when requested by email.

I've made dozens of masks recently. It's not something any of us thought we would be doing this year. I have to admit the novelty has well and truly worn off. Someone asked me to make her a mask using Christmas material. I agreed, but don't know when I will feel like doing it. Possibly at Easter 😀.


Saturday, 5 September 2020

More worry monster masks...


Crikey! I know it's been a while since I posted, but I wasn't expecting to have to learn a whole new Blogger. I expect there were good reasons for the changes, though I was very used to old Blogger. I know I can go back to it, but I'll see how I get on with the new, improved version before I do that.

Here are another 13 masks that I sewed and posted off to Knit-for-Nowt. In July, I suggested it might be a good idea to add little face masks to the knitted worry monsters that go off to teachers and therapists. I didn't realise I was opening up a can of worms. This little batch is my third attempt to make something suitable! The first two batches fitted only the smaller monsters because the ribbon ties were too short and the mask shapes weren't quite right.

For safety reasons, the ribbon ties can't be any longer. So this batch has elastic loops and elastic ties that will hopefully stretch to fit more of the monsters. I also had to bin my fancy, diamond shape design because it was apparently covering the monsters eyes. Having looked at the gallery of monsters on the Knit-for-Nowt website, I suspect these rectangular masks will do the same because a lot of the noses are in between the monsters' eyes. 

I'll have to wait and see what Clare says about this attempt.  My ultimate aim is to write a set of instructions for whichever mask fits most of the worry monsters. Then other people will be able to join in the mask sewing fun.

Now, I really must catch up on all my favourite blogs. See you all soon...


Saturday, 25 July 2020

I spoke too soon...


When I said I was done with masks, I spoke too soon. As I was putting away my sewing machine, I had one of those Eureka moments. Why not make face masks for the worry monsters that Knit-for-Nowt gives to therapists who work with traumatised children? I contacted Clare who runs the group and she thought it was a great idea because a lot of these children will be coming across adults who have to wear face masks and some children are afraid of them. I think there will be more traumatised children than ever after this year's events.  If I had had to miss so much school and stay at home for months as a child I know I would have been climbing the walls. 

Clare gave me a few basic measurements and I sewed some masks in various shapes and sizes. She will try them against the worry monsters that are sent to her and let me know what works best. Then I will write some instructions for other people who might want to sew some. They are quite easy. In fact, the two white masks in the photo came from shirt cuffs donated to me by Hubby. These would be extremely easy for anyone with a serger machine to make. I don't have one of those and my old sewing machine can't cope with raw edges. So I won't be making any more. But I included them as an example of what can be made.

Clare requested cheerful material for the masks. I splashed out and bought some from Ebay. A little goes a long way especially if you use scrap material as a backing layer. I also recycled some material I have been holding onto for years. The orange hippo material in the centre of the photo originally covered a beanbag that we used to use to prop up Daughter when she was a baby. I've always l liked the material and knew it would come in useful for something. I was thinking of bags or cushion covers. Little did I know what it would eventually be used for.

I hope everyone is well. Stay safe....


Thursday, 25 January 2018

Therapy puppets and a project bag...


Following my last blog post about worry puppets, I have just finished sewing two therapy puppets. These are for the same organisation Knit-for-Nowt.  They are used, as before, by therapists, social workers and teachers, but differ slightly from the worry puppets. The therapists have requested that these puppets should have a sad face on one side and a happy face on the other side. This makes them useful in role play and discussions about emotions. They also do not have a pocket for the written worry. 

The pattern I used is on this page. It is the basic (unstuffed) hand puppet. I thought it would be quicker than knitting a worry puppet. It was a VERY easy pattern. But there was such a lot of hand-sewing involved that it actually took as long (or longer) than the knitted puppets. That wasn't a problem as I like sewing by hand. The main body can be sewn by machine. But the hair, facial features and fiddly hemming have to be done by hand. As requested, both my puppets have a sad face and a happy face. 

I deliberately chose a hair colour that is not natural so that children wouldn't have any problems identifying with the puppets. I remember completely rejecting a doll when I was about 6 because it had blonde hair. The irony is that photos show I also had fair hair at the age. My parents had dark hair and I just assumed I did too.

The material came from a discarded sweatshirt, seen here:


I cut off both sleeves, then cut the pattern pieces. One of the puppets came from lower down the sleeves, hence the cuff effect. The rest of the sleeves became the heads and second puppet. I was a bit surprised that I had only enough material for two puppets. Of course, I could have made a few more from the body of the sweatshirt. But I needed a project bag to replace the tatty, plastic carrier bag that was sitting on my sofa with knitting needles poking out at dangerous angles. This is what I made:


It probably took less than an hour to make. I simply cut across the chest of the sweatshirt and sewed the cut edge with a double seam for strength. I rounded the corners slightly to avoid the Mary-Poppins-carpetbag effect. The top of the bag didn't need any hemming as it is the lower ribbing of the sweatshirt. I sewed on two handles that I removed and saved from a fancy Christmas gift bag. It is a very wide bag simply because the sweatshirt was large. But it is perfect for holding balls of wool and long needles. Anyone getting rid of children's outgrown sweatshirts could use this same method to make little bags for holding toys etc.

I have already started my next project. I am making more worry puppets, but this time I'm amending a double knit pattern to suit Aran yarn. That isn't as straightforward as it sounds. The brain cells are definitely having to work overtime....


Sunday, 10 December 2017

Cosy, just in time for winter...


It must be winter. The first snow of the season is on the ground outside my window and I am craving stodge and all things bad. But my halo isn't completely tarnished because I have done my bit for the planet. I turned these four cushion covers that had seen better days into a runner for the end of the bed.


These covers are at least 10 years old. The zips were playing up and the material was faded with the odd splatter of ink (Daughter) and paint (me). I still liked them and couldn't bring myself to throw them away when I bought some new covers. So...

I cut 8 equal size panels, sewed 2 strips of four panels and then sewed the strips together. I discovered the insides of the covers were still perfect and the material was as good as reversible. The well-worn outsides are now hidden forever inside this runner. The colour in the top photo is more true to life. It was taken on a sunny day. The finished item was photographed by artificial light today. What a difference a couple of weeks make.

Ignore the white material in the top photo. I was planning to use it as a lining, but I didn't feel it was needed. This material is thick and will make the perfect feet warmer on cold nights. I even feel warm just looking at the rich coral colour.


I can't claim to have made the lovely patchwork duvet cover. But I can appreciate it....probably even more because I could never imagine making something like this. I vaguely considered going the extra mile and quilting the bed runner, but reality and common sense prevailed. Time is marching on and I know my limits!

Eagle-eyed blog readers will notice that my iron did not come anywhere near the duvet cover or bed runner. I know these creases will drop out in a couple of days, so why waste electricity? That's my excuse and I'm sticking to it!

I have a busy couple of weeks ahead of me. So this is probably my last post of 2017. Once again I have really enjoyed the blog world and am sending


to all my lovely readers. See you all in 2018.


Monday, 13 November 2017

2 more shirt cushions...


Here are two more cushion covers that I upcycled from Hubby's shirts. I have now made four of these, which is probably enough for now. Three of them will be gracing the sofa bed in the spare room when we have visitors over the Christmas holidays. I'm hoping that one or two of the visitors like them enough to ask me to make some for them. I love making these, but there is a limit to how many a sofa can take before looking weird.

Most of Hubby's shirts are blue. So I have been lucky to have these other colours to tone in with my furniture. However, I do have my eyes on some particularly lovely denim type shirts that would make useful bags. One day...

PS: I know this is primarily a "woolly" blog. I'm still beavering away using up my 4 ply yarn. But it takes me so long to finish anything that I like to sew something quick just so that I have something to blog about. I'm not a huge Facebook fan, but I recently joined an upcycling group on there and some of the ideas are very clever. 


Sunday, 22 October 2017

Another shirt cushion plus curtain tie-backs...


We live in a 1930s house that is a bit of a money-pit. For most of the year I have been decorating/repairing/updating things that nobody except me seems to notice either before or after. Hey ho. However, it has all created a feeling of quiet satisfaction with our house and we talk less now about moving than we used to. Result!

My last hurrah before the cold weather arrives and just makes me want to hibernate was to add a finishing touch to the dining room. There was a bare corner loved only by the cat because that was where we kept her food bowl.

Now it looks like this:


I brought down a wicker chair from a bedroom where it was rarely used. Then I made a cushion cover from another of Hubby's discarded shirts. The colours are perfect as we have a green and cream theme going on in this room. I even turned the shirt cuffs into curtain tie-backs. There are lots of online tutorials for making phone cases from cuffs. But I wasn't able to find a tutorial for tie-backs. So these could be the world's first.

They were so simple to make. I cut off the cuff and buttoned it up around the curtain. Ta dah! That would have worked perfectly if the curtains had been lightweight. However, mine are quite thick cotton that creases easily. 

I decided that the tie-backs needed to be a bit longer. I considered various ways to add length. The curtains are floor-length so there needed to be a way to untie the tie-backs to take them off. I could have simply sewn a ribbon or more of the shirt material onto each end. I checked with Hubby whether or not he would be prepared to tie and untie knots every day. It was a NOT...which I already knew but thought it would be polite to ask.

So it was back to the drawing board and I came up with a less elegant but more practical solution. I sewed a piece of elastic to one end of each cuff. Then I snipped a little hole in the other end of the elastic and used this as a button hole.

You can just about see it here:


You can't see the elastic when the tie-backs are on. So I am very happy with how everything turned out. This room faces south and catches the sun for most of the day. It will be a lovely corner for reading a book.

The cat is currently sulking because I have moved her bowl to another part of the room. It must be a whole 5 feet away! But the cat is studiously ignoring it and sitting under the chair waiting for the food bowl to come to her. By tomorrow she will be hungry enough to realise that isn't going to happen!


Thursday, 12 October 2017

A shirt cushion cover...


I have been busy sewing today. I needed a break from knitting with 4 ply yarn that seems to last forever. The catalyst was finding a perfectly good shirt in my waste bin. Hubby has to dress well at work. He buys expensive shirts and, much to my annoyance, discards them when there is plenty of wear left in them. I usually rescue them for the local charity shop.

This time I loved the material. It was thick and strong. Hubby ... I'm resisting cracking a joke about "thick and strong" ... usually buys blue shirts. He must have found his feminine side when he bought this one because it is a lovely mix of jewel colours. Here is a close-up:


It might look like a lumberjack shirt here. But the quality was amazing. I just happened to be walking along Regent Street in London this morning and noticed a whole shop full of shirts by this designer. 

I know from experience how surprisingly difficult it is to sew with checks. This shirt made it look easy. All the colours and checks lined up perfectly at the seams. That made cutting up the shirt and sewing the cushion cover a walk in the park.

In less than an hour, I turned this rather large shirt


into this cushion cover


I found the idea on the Internet. There are many online tutorials for turning shirts into cushion covers. Most tutorials are identical; so I won't link to the tutorial I followed because that would be favoritism. But this cushion cover really is easy to make. It cost peanuts to sew and the inner cushion pad was a bargain in a bulk buy from Argos. 

Anyone who wants to make one of these could simply go to a charity shop and buy a very inexpensive shirt. Some people make "memory shirts" to remind them of someone who is no longer here.

I love how this turned out and even Hubby, who rarely comments on my craft work, is impressed. I'm planning to make a few of these for the sofa bed in our guest room. I just have to wait patiently for more shirts to become available!


Thursday, 20 April 2017

The desk mat with a secret ;-)


When my employer set me free (woo hoo!) last year, I celebrated with a little trip to Yorkshire and Lincolnshire. It was in Lincolnshire that I spotted and bought a little antique desk. It had obviously been much used and was showing its age. But we liked it because it is the same age as our house.

I had a quote to redo the top. The restorer didn't think it needed doing because he liked the "patina". When he quoted £300 I fell in love with the patina as well.

I have cleaned and waxed it and it now looks perfectly acceptable. But it was missing something. We bought a new desk lamp and that helped a lot. Then I had the idea of buying a leather desk mat to go on top. These sell for about £50 on Ebay; so I moved quickly on to Plan B.

I bought a large piece of brown faux leather for about £4. I have already used some to make a door draught excluder that costs £40 on Ebay. So I am now up to £90 of items from a £4 piece of material.

It needed an insert and I puzzled over what to use. Then I remembered something that has been in the bottom of my wardrobe since 2012. That was the year when the Olympic Games were held in London and other UK venues. The atmosphere was so great that year and, quite honestly, hasn't been matched ever since. I was so involved that I even went to the victory parade in London. 

I don't usually go to these victory parades. But I have watched them on tv and have seen the crowd holding up placards. Mystery solved. Clever companies give out these boards and ask people to write messages and then hold them up. Free advertising!  My placard came from British Airways. I like the Union flags all around the edge. I don't like my soppy message, so that is covered up in the photo by the strategically placed faux leather!


I measured very, very carefully and cut out the leather. I have been watching a recycling tv programme called "Money For Nothing" and copied the idea to hold the leather together with clips rather than pins to avoid holes.


I was worried that my old sewing machine wouldn't be able to cope with 2 layers of faux leather. But it purred along and here is the finished result.


Hubby and I are both really pleased with it. My eventual aim is to move my laptop to the desk and to do my computing work there. Now I will be happy that the top is protected.  

I'm glad I kept this placard. It has come in really useful and I still get that warm feeling and happy memories when I look at my new desk mat.  Hopefully, it will last for decades. I suppose it will be thrown away one day. But I doubt that it will ever be opened up. My secret insert is preserved for posterity!


Monday, 3 April 2017

A draught excluder costing almost nothing....


I mainly knit and crochet. But occasionally I sew. This is my latest project; a draught excluder made to fit my door perfectly. The front of my house faces north and, when the wind is coming from that direction, my front door lets in a generous helping of freezing Arctic air. 

I only discovered this recently when I was crawling along the floor painting the skirting boards. There is a tiny gap under the door, without which the door probably would not open. It has to remain; but it was contributing to the large winter heating bills we have here. So I simply had to do something about it.

I thought about buying a draught excluder. But I read the reviews of various tapes and strips and decided that nothing available off-the-peg would cure the problem. I saw a beautiful brown leather snake-like draught excluder on Ebay, but the price was eye-watering. That was when I had my eureka moment.

I realised that I already had all the materials necessary to make a draught excluder almost identical to the one on Ebay. 
All I needed was a remnant of leatherette left over from another project (more about that in another blog post) and some of those foam chippings that are often used to pack fragile items. Luckily, I always keep these chippings in case they come in useful.

I made a long tube, stuffed it with the chippings and sewed the end. It was simple to do, took a leisurely hour and saved me about £40 which is what they sell for on Ebay! Maybe I should go into business. The hardest part was stuffing the foam into the tube. It took a lot more than you can see in the photo! I eventually used a broom handle to pack it all in tightly.

Here is the finished product actually in situ. It looks like a rather odd long sausage. But it blocks the gap between the mat and the door perfectly. The foam chippings inside make it flexible and easy to push right into the gap.


Anyone with basic sewing skills could make one of these. You could use any scrap of material, though I would recommend something that can be wiped clean as draughts are hardly dust-free! 

The advice "measure twice, cut once" also applies here. You might think it looks odd. But the luxury of a correctly fitting draught excluder is priceless. ...and mine truly was. It cost nothing except my time and will hopefully last for many years. 

Today was the warmest day of the year so far. So it seems a strange time to make a draught excluder. But our nights are still cold and this morning was surprisingly foggy. It wasn't quite "The north wind doth blow and we shall have snow". But it will be one day, and I am PREPARED.


Thursday, 22 September 2016

NOW it's autumn.....


I am ready to face up to the fact that autumn has arrived, even though our weather here is warm and I still haven't turned on the heating.  Woo hoo!

This is a photo of a tapestry that I sewed over 40 years ago!!  I loved the tapestry when I bought the kit, loved it for the two years** it took to sew and loved it enough to have it framed when it was finished.  I knew it would take a long time to sew, so I started with the dark colours and ended with the light colours.  That hint of genius meant it stayed as clean as possible.  I'm quite impressed that I managed to think like that when I was 19.

I bought this in the 1970s when brown and orange were in fashion. Styles changed and it sadly ended up in the loft where I recently rediscovered it while on a cleaning/sorting/disposal marathon. The photo isn't brilliant as I was still in the loft and the flash came on. The tapestry, along with everything else in the loft, was covered in a layer of dust.  But I was very happy as I thought it had gone missing during a house move thirteen years ago.

Coincidentally, I spent a lot of time this year decorating my walls in neutral colours and I have just thought of the perfect place for it. Today's mission is to find a pretty chain, polish the tapestry and to hang it in full view before sunset. 

STOP PRESS:
Here it is hanging on my wall.  It doesn't look straight in the photo but it really is!  I must do a photography course one day!  It was hard to hang because I wanted to line it up with a mirror and bookcase further along the wall.  It is doing a good job filling a gap that was left after culling my books and removing a bookcase.


**I noticed that I was so proud of this work of art that I signed the back of the frame in my best handwriting.  I also added the dates.  It actually took less than a year.  It just felt like two years!

Saturday, 23 August 2014

Four for the boys.....


Here is the fourth and last pair of shorts that I will be making for a while.  The material for these came from a long dress that my daughter was finished with.  They will fit a 4 year old boy.  I originally planned to make 5 pairs but realised at the last minute that the material I had set aside for the fifth pair was too girly for any boy to want to wear.

So this is the little collection of shorts that will be going off in the post to Sew Scrumptious for delivery to various countries in Africa and Asia:


Here is the free pattern and tutorial that I used for the shorts.  They were a very economical project as I already had the old t-shirts and thread.  I bought good quality waist elastic as this is a crucial part of the shorts!

I tend to sew in short spells....excuse the pun....and I feel that this spell is now over.  I have started on another project which I have been looking forward to for a few weeks.....but that will be another blog post.


Saturday, 16 August 2014

Third pair of shorts....


Here is the third pair of shorts I have just sewn from this simple free pattern and tutorial.  Once again I cut up an old t-shirt and reused the material.  It is a soft shade of khaki green and should fit a child aged 2-3 years.  I have 2 more to make and will then send all 5 off to Sew Scrumptious for delivery to various countries in Africa and Asia.

....just a brief post today as I am still going through a very busy spell.


Saturday, 2 August 2014

Second pair of shorts....


Here is another pair of shorts for boys aged 2-3 years.  I reused another old t-shirt.  I'm a bit bemused and maybe a bit flattered that one of my baggy t-shirts has only enough material to fit a toddler.  My paper pattern piece for shorts for 4 year olds is just slightly too big.

I had a Eureka moment and sewed in a little ribbon to show the back of the waistband. 


I recently bought a bargain job lot of ribbon and obviously it included a duff one.  This was a wide piece of black ribbon which I know I will never use......except for a project like this.  I simply cut a piece of ribbon, folded it in half and sewed the raw edges into the waistband.  The idea isn't rocket science, but I was stupidly pleased when I thought of it.  A little boy can find the back of his shorts and I found a way to use my black ribbon!

These shorts will eventually join a few others and go off to a children's charity.